343 words
2 minutes
How to Anchor a Fence Securely in Sandy Garden Soil

Jennifer Hayes Arborist & Tree Specialist
Published: 2026-06-29
The Sandy Soil Challenge
Sandy soil drains quickly but provides poor lateral support for fence posts. Without proper anchoring, fences in sandy soil will lean within months and collapse within a few years.
Anchoring Methods (Most to Least Secure)
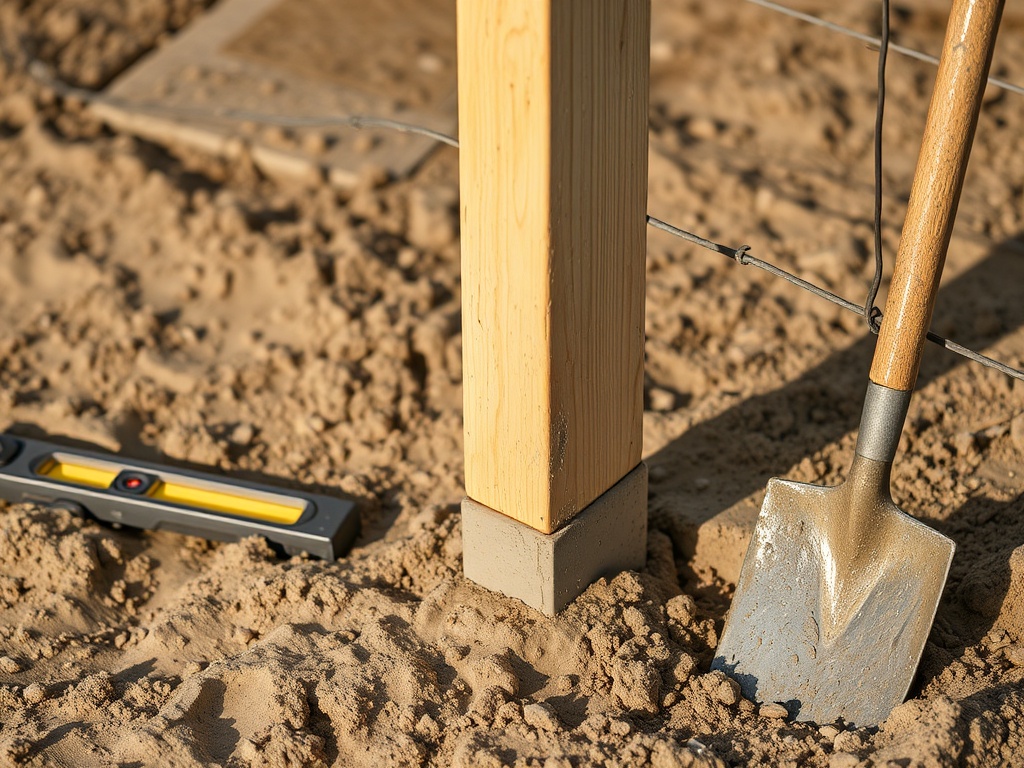
1. Concrete Footing with Flared Base (Best)
- Dig hole 24-30 inches deep, wider at the bottom than the top (bell shape)
- The flared base prevents the post from being pulled upward by wind
- Use fast-setting concrete formulated for sandy soil
- Allow 48 hours of curing before attaching fence panels
2. Concrete Tube Form (Sonotube)
- Use a 12-inch diameter cardboard tube form
- Fill with concrete to create a solid pillar
- Embed post anchor bracket in wet concrete
- Provides maximum surface area for sandy soil grip
3. Gravel and Concrete Hybrid
- Fill bottom 6 inches of hole with crushed gravel (compacted)
- Add concrete on top
- Gravel improves drainage and prevents concrete erosion in sandy soil
4. Post Anchor Spikes (Budget Option)
- Metal spikes driven into the ground with a sledgehammer
- Post slots into the anchor bracket on top
- Suitable for lightweight fences only (picket, decorative)
- May loosen over time in very sandy soil
5. T-Post with Concrete Collar (For Wire Fences)
- Drive metal T-posts deep (36+ inches)
- Pour concrete collar around base (12-inch diameter)
- Best for agricultural or garden boundary fences
Step-by-Step Installation (Concrete Method)
- Mark post locations every 6-8 feet using stakes and string
- Dig holes 24-30 inches deep, 12 inches wide at top, 18 inches at bottom
- Add 4 inches of gravel and compact with tamping bar
- Place post and check with level (all directions)
- Brace post with temporary 2x4 supports
- Pour concrete slowly, ensuring no air pockets
- Slope concrete surface away from post to shed water
- Wait 48 hours before removing braces or attaching panels
Common Mistakes to Avoid
- Holes too shallow: In sandy soil, 18 inches is NOT enough. Go 24-30 inches minimum.
- No gravel base: Concrete in direct contact with sand erodes faster
- Premature loading: Don’t attach heavy panels before concrete cures
- Ignoring drainage: Water pooling around posts accelerates decay
Conclusion
For sandy soil, the bell-shaped concrete footing with gravel base is the gold standard. It resists both vertical pull-out forces (wind) and lateral forces (leaning). Budget for 2 bags of concrete per post — it’s cheaper than rebuilding a collapsed fence.
Written by Jennifer Hayes
Arborist & Tree Specialist
Certified Arborist with 15 years of experience in tree care and urban forestry. ISA Certified Tree Risk Assessment Qualifier. Passionate about sustainable landscape design and native species preservation.
View all articles by Jennifer →
Related Articles
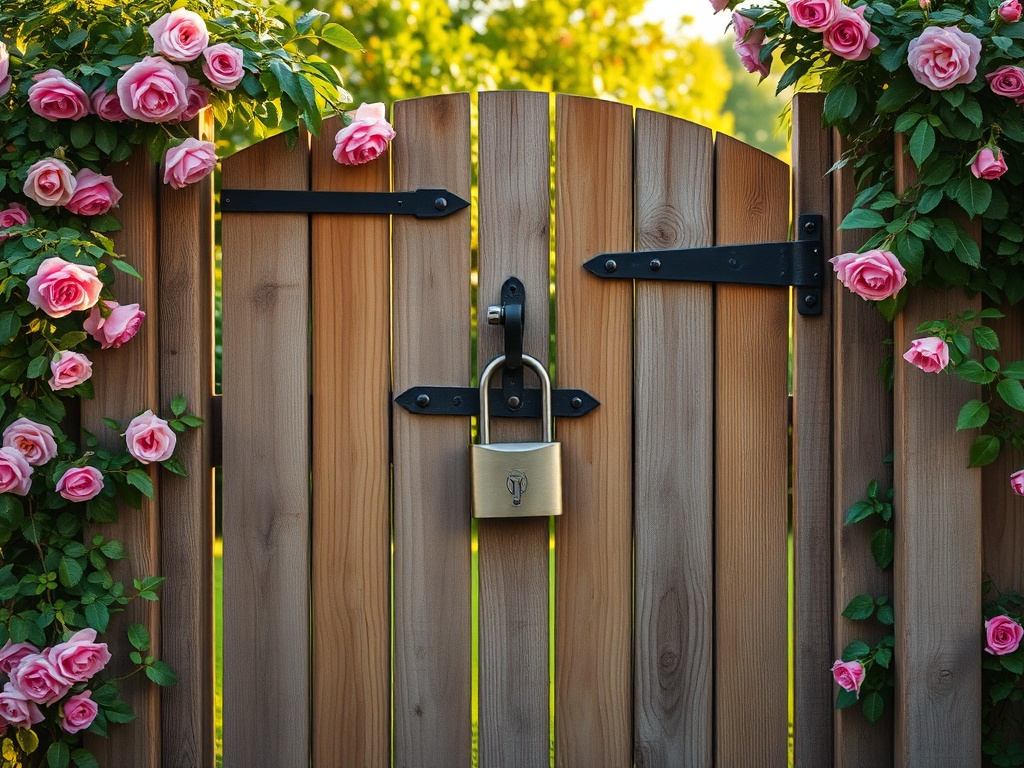
How to Secure a Garden Gate to Prevent Unauthorized Access
Learn practical methods to secure your garden gate against intruders, from heavy-duty locks to smart sensors. Protect your garden with these proven security strategies.
285 words
|
1 minute
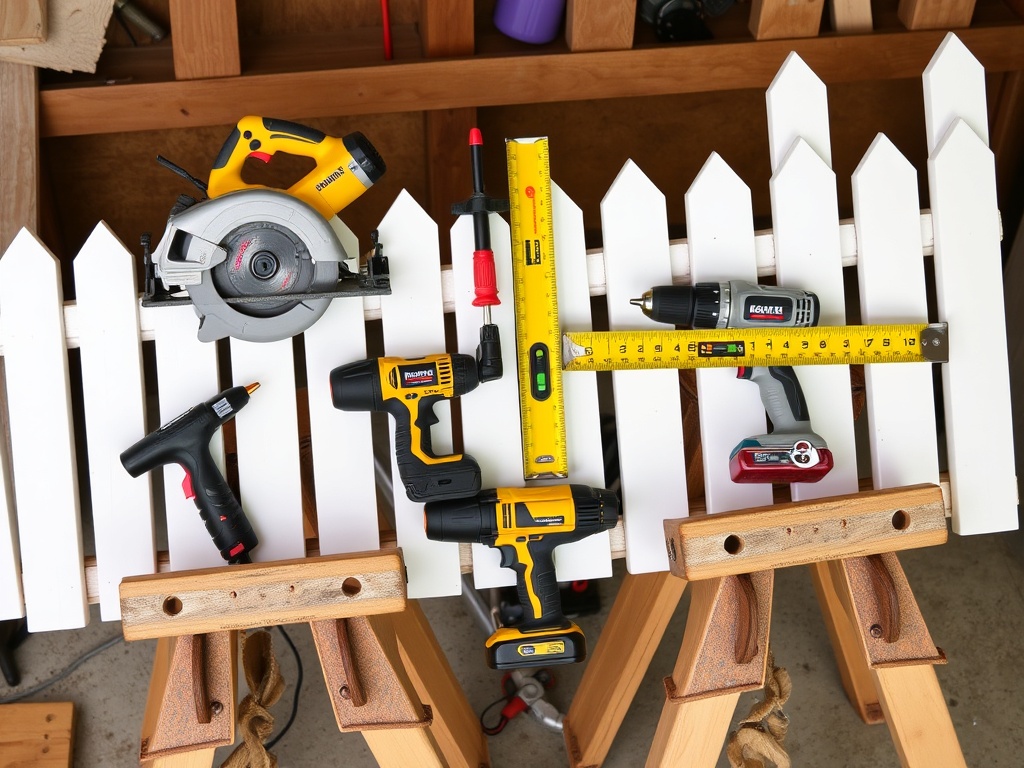
What Tools Are Needed to Build a DIY Garden Picket Fence
Complete tool checklist for building a garden picket fence. From post hole diggers to levels, learn what you need before starting your fence project.
286 words
|
1 minute
What Gloves Are Best for Protecting Against Insect Bites While Gardening
Discover the best gardening gloves for insect bite protection. Compare materials, cuff lengths, and brands to keep your hands safe from mosquitoes, ticks, and thorns.
284 words
|
1 minute